
Welcome to the Viper 5706V installation manual guide, designed to help you understand and install the system properly․ This manual covers key features, installation steps, and safety precautions to ensure a smooth setup․ The Viper 5706V offers remote start functionality, advanced security, and compatibility with various vehicles, making it a powerful car alarm system․ Proper installation by an authorized technician is crucial to avoid complications and ensure optimal performance․
Overview of the Viper 5706V Installation Manual
The Viper 5706V installation manual is a comprehensive guide designed to assist users and technicians in successfully installing the system․ The manual spans 67 pages and is available in PDF format for easy access․ It covers essential steps, safety precautions, and detailed instructions for proper setup․ Key sections include system requirements, wiring diagrams, and troubleshooting tips․ The manual also emphasizes the importance of professional installation by authorized dealers to ensure compatibility and functionality․ Compatibility warnings, such as avoiding manual transmission convertibles, are highlighted to prevent installation issues; This guide ensures a smooth and secure setup process for the Viper 5706V system․
Key Features of the Viper 5706V
The Viper 5706V offers remote start, advanced security, and vehicle compatibility, ensuring a powerful car alarm system with user-friendly controls and enhanced protection features․
Remote Start Functionality
The Viper 5706V features a remote start system, allowing users to start their vehicle from a distance․ With its two-way remote, you can confirm the engine has started․ The system supports both automatic and manual transmission vehicles, requiring MTS Mode for manuals․ It ensures convenience, especially in cold climates, by pre-heating the car․ Proper installation by an authorized technician is essential for optimal performance․ This feature enhances comfort and security, making it a standout addition to your vehicle’s security system․ Easy to use, it provides peace of mind with every start․
Advanced Security Features
The Viper 5706V boasts advanced security features, including a shock sensor, two-way remote communication, and zone status indicators․ The system provides real-time alerts for unauthorized access, ensuring your vehicle’s safety․ With features like Warn Away and Full Trigger outputs, it deters potential intruders․ The remote offers instant feedback, confirming system status and security breaches․ Enhanced encryption ensures secure communication between the remote and vehicle, safeguarding against hacking․ These features combine to deliver a robust security solution, protecting your vehicle with cutting-edge technology and reliability․
Vehicle Compatibility
The Viper 5706V is designed for compatibility with a wide range of vehicles, but certain restrictions apply․ It should not be installed in convertible vehicles with manual transmissions due to potential risks․ Proper installation by an authorized technician ensures compatibility․ The system works with most modern vehicles, but specific make and model checks are essential before installation․ Always verify compatibility to avoid issues and ensure the system performs as intended․ Professional installation is highly recommended to guarantee seamless integration with your vehicle’s electrical and security systems․
Alarm System Capabilities
The Viper 5706V offers advanced security features, including a robust alarm system designed to protect your vehicle from theft and unauthorized access․ It features zone detection, shock sensors, and a high-pitched siren to deter potential intruders․ The system can monitor the vehicle’s interior and trunk, providing comprehensive protection․ It also includes a warning chirp to alert nearby individuals of suspicious activity․ With its advanced sensors and customizable settings, the Viper 5706V ensures a high level of security for your vehicle, offering peace of mind whether you’re nearby or far away․
System Requirements and Compatibility
The Viper 5706V is designed for vehicles with compatible electrical systems and must be installed by an authorized Directed dealer to ensure proper functionality and safety standards․
Vehicle Compatibility Checklist
Ensure your vehicle meets the Viper 5706V’s compatibility requirements․ The system is not suitable for convertibles with manual transmissions due to potential risks․ Verify your vehicle’s electrical system supports remote start functionality and check for any factory-installed alarms or immobilizers that may interfere․ Consult the manual or contact Directed support for specific vehicle compatibility․ Proper installation by an authorized dealer is essential to avoid issues and ensure optimal performance․
Essential Tools for Installation
To install the Viper 5706V, gather essential tools: wire cutters, strippers, and crimping tools for wiring connections․ A multimeter is useful for testing electrical circuits․ Screwdrivers and Allen wrenches are needed for mounting components․ A soldering iron may be required for certain wiring connections․ Additionally, T-taps or connectors can simplify wiring without cutting․ Ensure you have electrical tape for insulation and a drill for mounting hardware․ While some tools are optional, having them on hand ensures a smooth installation process․ Refer to the manual for specific requirements․
Electrical System Requirements
The Viper 5706V requires a stable 12V power supply and is designed for vehicles with negative ground electrical systems․ Ensure your vehicle’s electrical system is compatible with remote start and alarm functions․ Avoid installing in convertibles or manual transmission vehicles without proper MTS mode setup․ A reliable battery and clean wiring connections are essential for optimal performance․ Always consult a professional installer for complex electrical setups to ensure safety and system functionality․ Proper grounding and power connections are critical to prevent system malfunctions․

Installation Preparation
Before starting, ensure your vehicle is prepared for installation․ Review the wiring harness, identify mounting locations, and verify system compatibility with your vehicle’s specifications and electrical system․
Pre-Installation Steps
Before proceeding, ensure your vehicle meets compatibility requirements, particularly avoiding manual transmission convertibles․ Gather essential tools, including wiring diagrams and screwdrivers․ Consult the manual to understand system components and electrical connections․ Verify the wiring harness matches your vehicle’s specifications․ If unsure, contact an authorized technician or Directed support․ Proper preparation ensures a smooth and safe installation process, avoiding potential risks or complications during setup․
Understanding the Wiring Harness
Familiarize yourself with the wiring harness to ensure correct connections; Identify key wires, such as power, ground, ignition, and starter leads․ Refer to the provided diagram for specific functions and vehicle compatibility․ Properly routing and securing wires prevents damage and interference․ If uncertain, consult the manual or seek professional assistance; Accurate wiring is crucial for optimal system performance and safety․
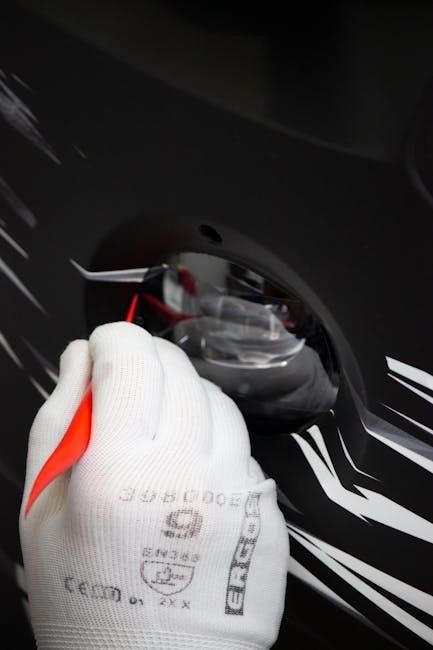
Mounting Locations and Considerations
Mount the Viper 5706V brain unit in a secure, dry location, such as under the dashboard, to protect it from heat and moisture․ Ensure the antenna is placed in a spot with a clear view of the vehicle for optimal signal strength․ Avoid direct sunlight on the antenna to prevent interference․ The siren should be mounted outside, ideally in a weather-protected area, to maximize sound output and deter tampering․ Always follow the manual’s guidelines for proper placement to ensure system reliability and performance․

Installation Steps
Connect the wiring harness to the vehicle’s electrical system, ensuring all wires are securely attached․ Program the remote start system and test functionality․ Resolve any issues promptly․
Connecting the Wiring Harness
Connect the wiring harness to the vehicle’s electrical system, ensuring proper alignment with the provided diagrams․ Match each wire to its corresponding port, checking for compatibility․ Secure all connections tightly to prevent interference․ Use the vehicle’s wiring diagram to identify correct ports for power, ground, and accessories․ Test connections with a multimeter if unsure․ Improper connections may cause system malfunctions․ Consult the manual or a professional if issues arise during this critical step․
Programming the Remote Start System
To program the remote start system, ensure the vehicle is in park and the ignition is in the run position․ Press and hold the remote start button until the parking lights flash, indicating the system is in programming mode․ Release the button and press it again within five seconds to confirm․ The system will chirp or flash the lights to confirm successful programming․ For manual transmission vehicles, ensure MTS mode is enabled․ If issues arise, refer to the troubleshooting section or consult a professional installer․
Testing the System Post-Installation
After installation, test the remote start by pressing the button twice to ensure the engine starts․ Verify the alarm functions by triggering the sensors and checking the response․ Test the range of the remote control and ensure all features, such as trunk release and panic mode, work correctly․ For manual transmission vehicles, confirm that the remote start engages properly with the MTS mode enabled․ If any issues arise, consult the troubleshooting guide or contact a professional installer for assistance․
Troubleshooting Common Issues
Common issues include remote control malfunctions, sensor sensitivity, and installation errors․ If the remote fails, re-pair it by following the manual’s instructions․ For sensor-related problems, adjust sensitivity settings or re-mount sensors․ Check wiring connections for loose links or damage․ Consult the error code list in the manual for specific solutions․ If issues persist, contact an authorized installer or Directed support for assistance․ Regular system checks can help prevent recurring problems and ensure reliable performance․ Always refer to the troubleshooting guide for detailed solutions․
Final Checks and System Verification
After installation, perform a thorough system verification․ Test all functions, including remote start, alarm triggers, and sensor responsiveness․ Ensure proper communication between the remote and system․ Check vehicle compatibility settings and confirm remote start operation․ Verify alarm features like shock sensor, door triggers, and panic mode․ Test trunk release and auxiliary functions if equipped․ Review error codes to confirm no issues exist․ Finally, ensure all safety features are enabled and functioning correctly to safeguard your vehicle․ This step ensures a reliable and secure system operation․ Consult the manual for detailed verification procedures․
Configuration and Customization
Configure your Viper 5706V system to suit your preferences․ Pair the remote control, customize features, and adjust sensitivity settings for optimal performance․ Ensure proper synchronization and functionality․
Pairing the Remote Control
To pair the remote control with your Viper 5706V system, open a vehicle door and turn the ignition to the “run” position․ Press and hold the remote’s button until the system confirms pairing․ Ensure the remote is within range during this process․ If issues arise, refer to the manual or contact support for assistance․ Proper pairing ensures reliable operation of remote start and security features․
Customizing Features and Settings
The Viper 5706V allows users to tailor settings to their preferences․ Adjust sensitivity, timer settings, and enable or disable specific features through the system menu or remote control․ Manual Transmission Start mode must be enabled for vehicles with manual transmissions․ Additional options include defogger activation during remote start and customizing zone alerts․ Refer to the manual for detailed instructions on adjusting parameters to optimize performance and security for your vehicle․
Adjusting Sensitivity and Parameters
Adjusting sensitivity and parameters on the Viper 5706V ensures optimal performance․ For shock sensors, disarm the system, locate the trim pot, and use a screwdriver to fine-tune sensitivity․ The tilt sensor can be adjusted similarly to prevent false triggers․ After adjustments, test the system to ensure proper functionality․ Proper calibration is crucial for balancing security and convenience․ Refer to the manual for detailed instructions and ensure all adjustments align with your vehicle’s specific needs and operating conditions․

Safety and Precautions
Always follow the manual’s safety guidelines to avoid risks․ Wear protective gear and ensure proper installation to prevent system interference or damage․ Avoid installing in convertibles with manual transmissions to minimize risks․
General Safety Warnings
Always follow safety guidelines to prevent risks․ Avoid installing the Viper 5706V in convertibles with manual transmissions, as it may pose interference risks․ Ensure proper installation tools are used to prevent electrical damage․ Never touch wiring without proper insulation or protective gear․ Keep the system out of reach of children to avoid accidental activation․ Ensure the vehicle is on level ground during installation to prevent unexpected starts․ Follow all local regulations and manufacturer instructions to ensure safe operation․
Installation-Related Precautions
Ensure the vehicle is in park and apply the parking brake before starting installation․ Avoid installing in convertibles or manual transmission vehicles to prevent interference risks․ Use proper tools and follow wiring diagrams to prevent electrical damage․ Never modify the vehicle’s electrical system without expertise․ Keep the system away from water and extreme temperatures․ Ensure all connections are secure to avoid malfunctions․ Only authorized dealers should perform installations to maintain warranty validity and ensure safety․ Always disconnect the battery before starting work to prevent accidental starts or electrical shocks․
Post-Installation Safety Measures
After installation, ensure the system is tested thoroughly to confirm proper functionality․ Regularly check all connections to prevent wear or corrosion․ Keep remote controls out of reach of children to avoid accidental activation․ Monitor battery levels and charge as needed to maintain reliable operation․ Avoid exposing the system to extreme temperatures or moisture, which can degrade performance․ Store the user manual for future reference and updates․ Ensure all safety features are enabled and functioning correctly to protect both the vehicle and occupants․ Schedule periodic inspections by authorized technicians to maintain system integrity and safety standards․

Troubleshooting Common Issues
Common issues include remote control malfunctions, error codes, and installation problems․ Check connections and settings, consult the manual for error code meanings, and contact support if unresolved․
Common Installation Problems
Common installation issues with the Viper 5706V include improper wiring connections, incompatible vehicle setups, and incorrect remote start configurations․ Many users face challenges with the wiring harness, particularly ensuring all terminals are securely attached․ Additionally, manual transmission vehicles require specific settings like MTS Mode to function correctly․ Improper installation can lead to system malfunctions or safety risks․ Always refer to the manual or consult a professional to resolve these issues effectively and ensure proper functionality․
Understanding Error Codes
The Viper 5706V system displays error codes to indicate specific issues during installation or operation․ Common errors include wiring faults, remote control malfunctions, or system communication failures․ These codes, such as “E1” or “E2,” are detailed in the manual to help diagnose problems quickly․ Understanding these codes is essential for troubleshooting and resolving issues efficiently․ Always refer to the manual or contact a professional if persistent errors occur to ensure proper system functionality and avoid further complications․ Regular checks can prevent most error-related issues․
Resolving Remote Control Issues
Remote control issues with the Viper 5706V can often be resolved by re-pairing the remote or replacing the battery․ Ensure the remote is within range and free from obstructions․ If problems persist, check for firmware updates or reset the system by disconnecting the battery temporarily․ Always refer to the manual for specific instructions, as improper steps may cause further malfunctions․ If issues remain unresolved, contact an authorized technician for professional assistance to restore full functionality and ensure reliable operation of your remote start system․ Regular checks and maintenance can prevent such issues․

Maintenance and Upkeep
Regular system checks ensure optimal performance․ Update software for the latest features․ Clean components to avoid malfunction․ Schedule maintenance to prolong system life effectively․
Periodic System Checks
Regular system checks are essential to ensure the Viper 5706V operates efficiently․ Inspect sensors, wiring, and connections for damage or corrosion․ Test remote start functionality and alarm responses․ Check the battery voltage and charging system to prevent power issues․ Verify software updates are installed for optimal performance․ Consult the manual for recommended schedules and procedures․ Clean components periodically to maintain reliability․ Address any issues promptly to avoid system malfunctions and ensure long-term functionality․
Software Updates and Firmware
Keeping the Viper 5706V system updated ensures optimal performance and security․ Regularly check for firmware updates on the Directed Electronics website or through authorized dealers․ Updates may enhance features, improve compatibility, and fix software bugs․ Use a compatible USB programmer or follow the manual’s instructions for updating․ Always backup settings before updating․ Avoid interrupting the update process to prevent system corruption․ Updated firmware ensures the system remains secure and functions as intended, providing reliable remote start and alarm capabilities․
Cleaning and Maintaining Components
Regular cleaning and maintenance are essential for the Viper 5706V system’s longevity․ Use a soft, dry cloth to wipe down the remote control and sensors․ Avoid harsh chemicals or moisture, which could damage components․ Inspect the wiring harness for dirt or corrosion and clean gently with compressed air․ Ensure the system’s exterior is free from debris․ For optimal performance, check and clean the sensors and antennas periodically․ Proper maintenance prevents malfunctions and ensures reliable operation of the remote start and security features․ Always handle components with care to avoid damage․

Warranty and Support
The Viper 5706V is backed by a comprehensive warranty, ensuring coverage for defects in materials and workmanship․ For support, contact Directed at 1-800-753-0600 or visit their website․ Extended warranty options are available for added protection․ Proper installation by an authorized dealer is required to maintain warranty validity and ensure system performance․ Refer to the manual for detailed warranty terms and conditions․
Understanding the Warranty Terms
The Viper 5706V is backed by a comprehensive warranty that covers defects in materials and workmanship for a specified period․ Proper installation by an authorized Directed dealer is required to maintain warranty validity․ The warranty ensures that any faulty components will be repaired or replaced free of charge, provided the system was installed correctly․ For detailed terms and conditions, refer to the official manual or contact Directed support; This warranty provides peace of mind and protects your investment in the Viper 5706V system․
Contacting Customer Support
For any inquiries or issues regarding the Viper 5706V, contact Directed customer support at 1-800-753-0600․ Visit the official Viper website for additional resources, including manuals, FAQs, and troubleshooting guides․ Directed Electronics also offers extended support through authorized dealers and online portals․ Ensure to have your product details ready for efficient assistance․ Customer support is available to address installation concerns, warranty questions, or system performance issues, providing reliable help to ensure your Viper 5706V operates at its best․
Extended Warranty Options
Extended warranty options for the Viper 5706V are available through authorized dealers or directly from Directed Electronics․ These options provide additional coverage beyond the standard warranty period, ensuring prolonged protection for parts and labor․ Customers can purchase extended warranties at the time of installation or within a specified period after purchase․ For details, contact customer support or visit the official Viper website․ Extended warranties offer peace of mind, covering repairs and replacements for components, ensuring your system remains functional and secure for years to come․
User Reviews and Testimonials
Cheryl from Cleveland praises the Viper 5706V, calling it the best car addition for Wisconsin winters․ She loves the remote start, warm car, and clear windshield․ Installation by Best Buy was excellent․
Customer Feedback and Experiences
Customers praise the Viper 5706V for its reliability and ease of use․ Many highlight the remote start feature as a game-changer, especially in cold climates․ Cheryl from Cleveland shared her enthusiasm, noting how the system transformed her winter commutes by allowing her to warm her car and clear snow effortlessly․ Users also appreciate the system’s advanced security features and seamless integration with their vehicles․ Professional installation, often recommended, ensures optimal performance and peace of mind for drivers․
Installer Recommendations
Professional installers emphasize the importance of following the Viper 5706V manual closely for a trouble-free setup․ They recommend ensuring vehicle compatibility, especially avoiding manual transmission convertibles, to prevent issues․ Authorized Directed dealers are highly suggested for installation due to the system’s complexity․ Proper wiring and configuration are crucial, and installers advise testing all features post-installation to ensure functionality․ Adhering to safety guidelines and manufacturer instructions helps avoid potential risks and ensures optimal system performance for years to come․
The Viper 5706V installation manual provides comprehensive guidance for a successful setup․ With its advanced features and clear instructions, it ensures a secure and efficient remote start experience․
Final Thoughts on the Viper 5706V
The Viper 5706V stands out as a robust car security and remote start system, offering convenience and peace of mind․ Its advanced features, such as remote start functionality and customizable settings, make it a top choice for vehicle owners․ While installation requires technical expertise, the comprehensive manual ensures a smooth process․ Overall, the Viper 5706V delivers reliable performance, enhancing both comfort and security for drivers in various climates and conditions․